
In a world of AI, Fabric Apps and all fancy things popping up at the moment, I have a need to go a little more back to basics. So in the first part of a bit of a series of what I’m building at the moment, this is how to connect Power BI to Power Automate: Running DAX Queries.
Power Automate gives us simple ways to connect into a semantic model and pull data, but how do you pull the data you actually need?
Let’s start with connecting everything up and getting all the pre-reqs in place!
Power BI Workspace
First of all make sure you have a Power BI report (open still in PBI Desktop), uploaded into a workspace with a connected semantic model. You will also need to ensure the account you are going into Power Automate with has permissions into the workspace.
- Power BI report uploaded to workspace
- Connected semantic model
- User account has permissions on the workspace
- Have the Power BI report open in PBI Desktop
PowerAutomate
Now into Power Automate at:
https://make.powerautomate.com
- Into My Flows / New Flow
- Then depending on choice the type (I have chosen Scheduled Cloud Flow)
- Give your flow a name and if following my Scheduled Cloud Flow add in a Schedule
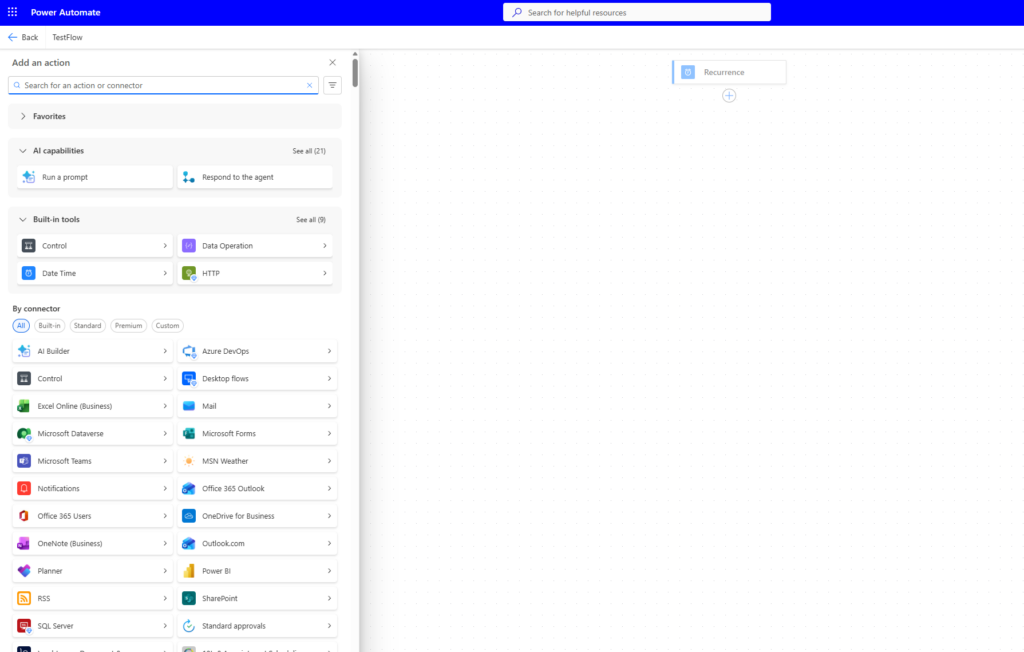
- Select the Plus under Recurrence, which opens the Add an Action tab And search for “Power BI”
Which should give you these options:
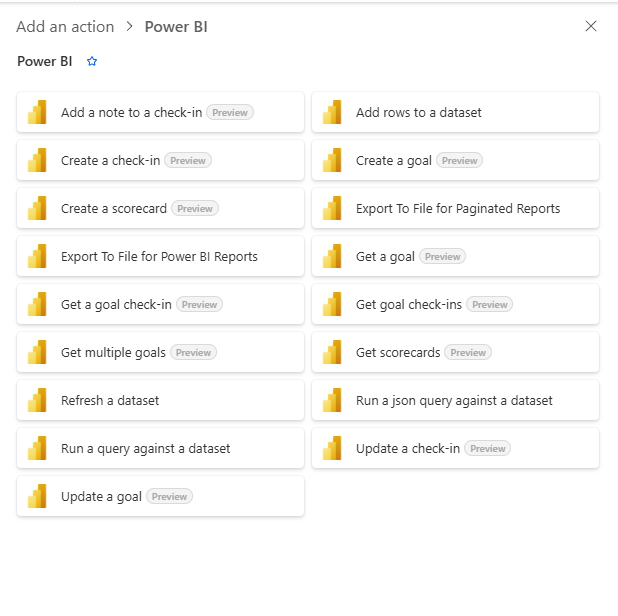
The option we need here is:
“Run a query against a dataset.
It will possibly ask you to sign in with an account (make sure to use one that has access to the Power BI workspace from earlier).
This should now give you this!
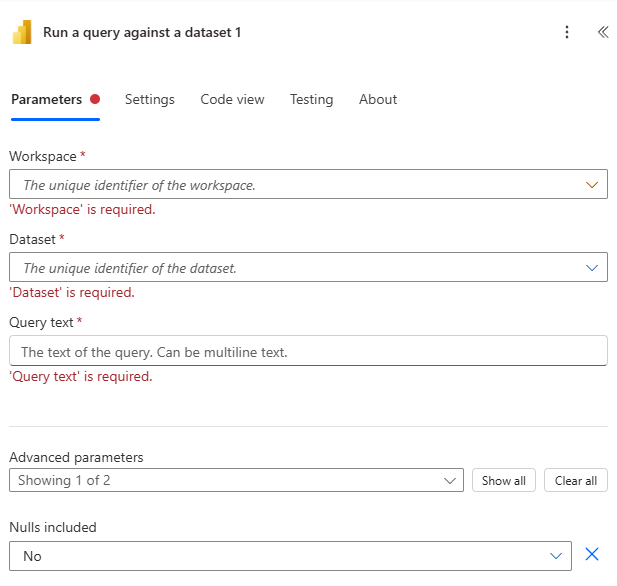
Next is as simple as choosing the Workspace and Dataset we want to use by using the various dropdowns. The main area we want to focus on is the Query Text.
Back into PowerBI Desktop
Best way now is to jump back into Power BI Desktop (make sure you have the same report open as what is uploaded to the workspace).
- Open Optimize and then Performance Analyzer
- Start Recording
- Refresh Visuals
- Select the visual we are wanting to export and you should see a Copy Query button / Run in DAX Query View
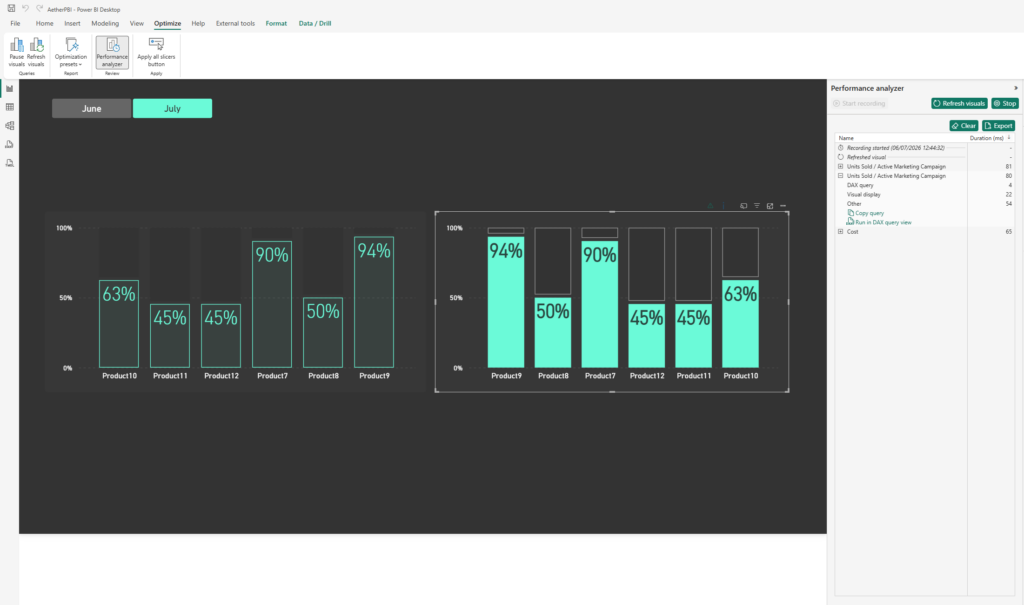
Select “Run in DAX Query View” and you will be able to see the raw DAX and the output it produces. For example, in my test data I get the below:
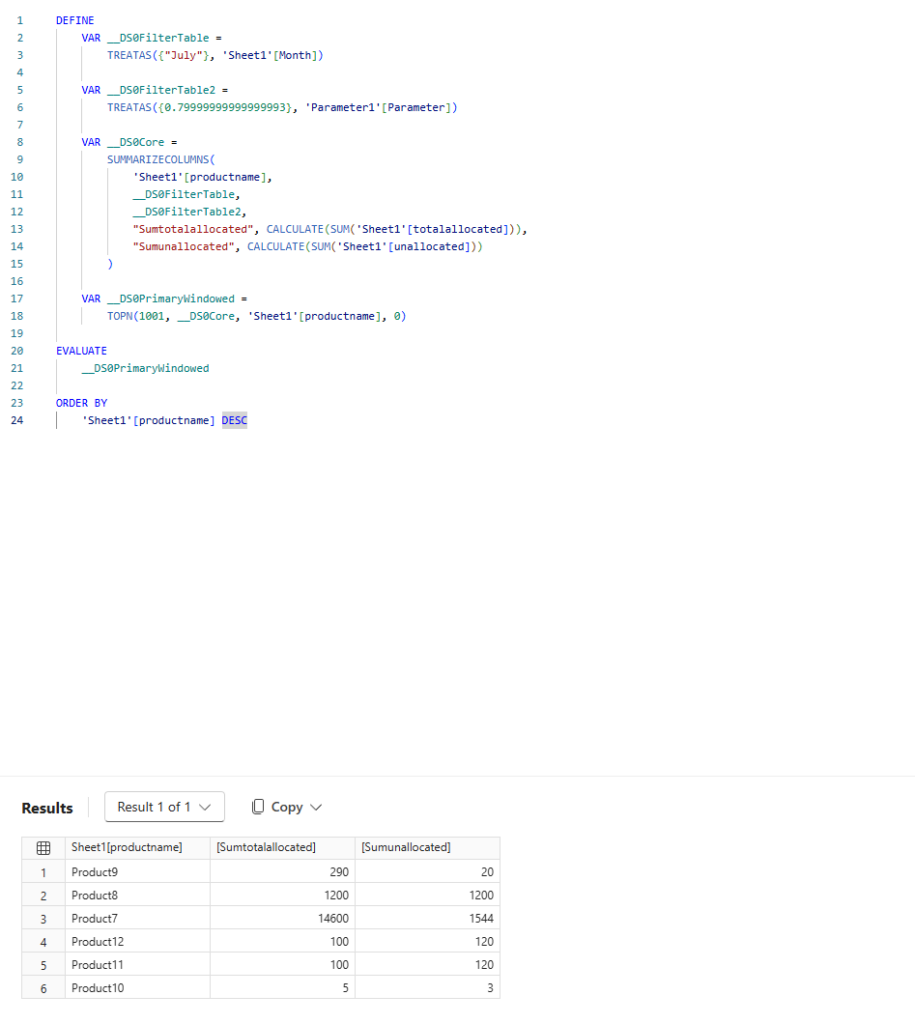
Now remember that Query Text field back in Power Automate? Copy the query from Power BI straight into that box!
And there we go, we now have Power Automate running DAX queries against your model, ready to be used in a number of ways!
A Bit Extra
Let’s just add some extra actions so we can extract that data and test through an email!
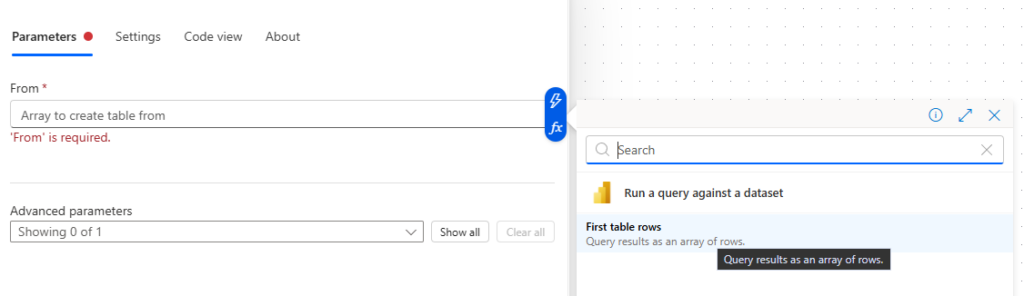
- Add a “Data Operations” action and then select Dynamic Content to add the data coming from Power BI.
- Add a “Send an Email V2” action, and fill in some relevant details such as To, Subject. Select Body and again choose Dynamic Content, but this time the output from the Data Operation.
Great! So let’s now save and test!
Into Outlook, and here it is body of an email!
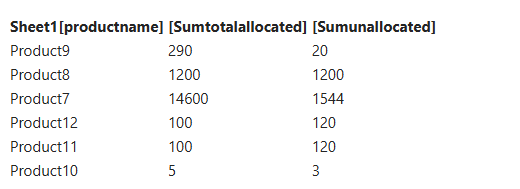
Looks a little basic, but that’s a problem for another time!
Thanks for reading through! Any questions, feel free to reach out!
But this is going to form the basis for a number of things we can do, whether that’s Power Automate, Copilot Studio, AI actions
Lots!